Help:Editing
Here's how to edit things. If you don't use the top bar, then follow this guide:
Text editing
Text is the major thing of wikis. Two apostrophes (on both sides) make italic text, three apostrophes makes bold, and five apostrophes makes both.
Code:
''Two'' apostrophes (on both sides) make italic text, '''three''' apostrophes makes bold, and '''''five''''' apostrophes makes both.
Images
To add images, add two square brackets (on both sides) of a file. Go to Special:Upload and then get your filename (Yes, including File:).
Code:
[[File:Chaz Wiki on 5-25-25.png]]
Very big, isn't it? After the filename comes some things to decide:
[[File:Chaz Wiki on 5-25-25.png|1|2|3|4|5]]
After the filename comes the size in pixels (1). After so is the format (2). It comes in four types:
thumbshows an image like a thumbnail (and is by default sized to your preferred one) (+ media viewer),framelessshows an image without a thumbnail ridging,frameshows an image as big as large as can be (with no media viewer), and;nonemakes it a plain HTML image.
After the format is the alignment (3) (left, center, right, or it is not specified), and then the alt (4) (always alt= before it), which should be the same as what comes after, the caption (5). There's actually a hidden sixth one, the link (6), done like the alt, but with a link after (always link=, then the link). So let's learn how to use links.
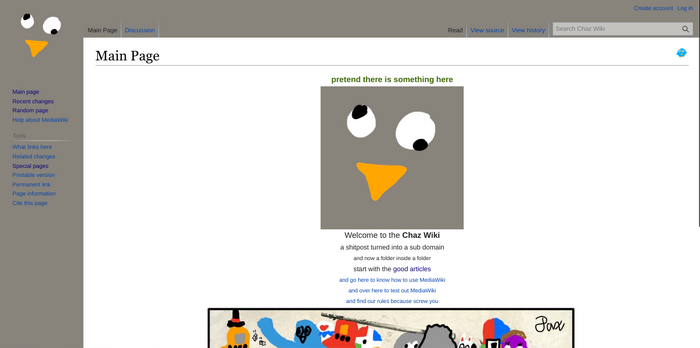
Code:
[[File:Chaz Wiki on 5-25-25.png|700px|thumb|center|alt=Chaz Wiki's main page|Chaz Wiki's main page]]
Links
Links are done with 2 square brackets (on both sides) around text that has an article, for example: Chaz is done with [[Chaz]]. You can also add a pipe divider (the long line that isn't a lowercase "L" or uppercase "i", |) and then some link text, you will have a labelled link. Peepy doesn't link to Peepy, look here: [[Peep|Peepy]].
Links that are red, for example: Teen titans go is done with [[Teen titans go]] (don't make that article) do not exist. To create a nonexistent article (don't use the example red link here, though), you can just click it. Pages can also be blanked and can become redirects, which requires using #REDIRECT and then putting a link with no label next to it.
External links
External links can be done in multiple ways. You can make a fake citation by using the HTTPS:// protocol before the website URL and putting 1 square bracket (on both sides) around it. [1] is done with [https://example.com]. You can also put the URL with the HTTPS:// protocol without the brackets to show the URL, like this: https://example.com. That's just by itself. If you add before the 1 end bracket a space, then some stuff, you will have a labelled external link. [https://example.com Example website] makes Example website.
Headers
A level one header is done with one equal sign before and after your header text: =like here=.
A level two header is done with two equal signs before and after your header text: ==like here==, and so on.
Lists
Lists can be done two ways, ordered (like <ol></ol>), and unordered (like <ul></ul>).
Ordered lists are done with hashtags (#), a space, and then content afterwards. Unordered ones use asterisks instead (*). When making a list, items are done without extra enters, so no:
- Hello!
- Hello? Why am I 1 too?
It's:
- Hello!
- Howdy!
Advanced
Coding
To code, use <code> before and </code> after your code line. If you need a series of code lines, use <pre> before and </pre> after your scripts. If you need to use Wikitext demo code, like in this guide, use <nowiki> before and </nowiki> after your now-disabled Wikitext.
If you need to use HTML tags, here are the only ones that work:
- The <big> tag makes things big.
- The <small> tag makes things small.
- The <sup> tag makes things superscript.
- The <sub> tag make subscript.
- The <br> tag makes breaks in texts. This can otherwise be done using two enters, 1 before your content, 1 where you'll write it:
Stuff. <br> Seconds!
makes:
Stuff.
Seconds!
- The <span> and <div> tags work as they do in HTML. Look at the Main Page!
- The <center> tag works!
The <center> tag works! - There's a convenient {{color}} template: Swap's name is often put in magenta color.
- The <abbr> tag abbreviates stuff. (
<abbr title="Capitol Hill Autonomous Zone">CHAZ</abbr>--> CHAZ) It also works to add hidden messages in articles, but they have to be decently small.
Gallery
Using <gallery> before and </gallery> after a series of images like this:
<gallery>
Thechaz.png|[[Chaz]]
Peep.png|[[Peep]]
RedSyver.jpeg|[[Red]]
Prince.jpeg|[[Prince]]
Cubeor.png|[[Cubeor]]
Peepy.jpeg|[[Peepy]]
</gallery>
makes this:
Tables
The hardest one of all...
To make a table, you need to start by using this:
{| class="wikitable"
|+ Caption text
|-
! Header text !! Header text !! Header text
|-
| Example || Example || Example
|-
| Example || Example || Example
|-
| Example || Example || Example
|}
| Header text | Header text | Header text |
|---|---|---|
| Example | Example | Example |
| Example | Example | Example |
| Example | Example | Example |
Here's an explanation (oh boy):
{| class="wikitable"makes the table.|+creates caption text.|-creates a table line, the divisor between table cells. It goes between everything, besides the top and bottom and the 2nd and 2nd-to-last rows.!starts a header row.|starts a normal row.
The double pipes (||) makes a column.
A row goes left to right and is put up and down.
A column goes up and down and is put left to right.
Talk pages
When talking to someone on a talk page, you should use a signature. It's a line of text telling everyone else who you are, when you posted, and a link to your user page. To use a siggy, put --~~~~, which should create something like this:
yada yada nada --Username (talk) 15:54, 10 June 2009 (UTC)
... or something like that. You can also use ~~~ to give just your siggy:
yada yada nada Username (talk)
... or something like that. You can edit your signature in your preferences.
To indent, you can use a certain amount of colons (:) to indent, like this:
Normal text
- Indent!
- Double colon! (Wait wha...)
Code:
Normal text
:Indent!
::Double colon! (Wait wha...)
Categories
To add a category add [[Category: and then add a name of a existing category, and then end it with two square brackets (]]).
Templates
Templates are pre-made assets that can be put into articles by using two curly brackets around the name of a page that has Template: in it. Some templates will have extra stuff to fill in. Most of them will tell you how to do such. To use inputs, use how many the template says, and use this mini-guide:
{{template|input 1|input 2|input 3}}
As you can see, the inputs have no spaces around them and are divided by pipe divisors. | That is a pipe divisor.
I think that's all. If there's anything- oh!
Actual Wikipedia-ing
When doing Wikipedia stuff, as in, making smart stuff, you can use this thing:
We should fight for our rights because, as Ezra Pound said,
If a man isn't willing to take some risk for his opinions, either his
opinions are no good or he's no good.
The code for that is this:
We should fight for our rights because, as <cite>Ezra Pound</cite> said,
<q>If a man isn't willing to take some risk for his opinions, either his
opinions are no good or he's no good.</q>
When getting this stuff, you should (I haven't) use citations, like this random piece of evidence I found:
As quoted after his arrest for treason; The Story of Disloyalty and Betrayal in American History by Nathaniel Weyl (1950), p. 400
How would I put it there though...
Well, I could do this: [1].
That is <sup><abbr title="As quoted after his arrest for treason. Weyl (1950), p. 400>[1]</abbr></sup>.
See that? If we had a URL, we could do this:
[2]
You can make a references section for evidence, like this:
== References ==
#: As quoted after his arrest for treason. Weyl (1950), p. 400
#: https://libquotes.com/ezra-pound/quote/lbq7d4s
Now I think this is it.
If you have any questions, see Help:FAQ.
